Five Favorite Features of SOLIDWORKS 2024
It feels like Christmas has come early. Every year around this time, the latest version of SOLIDWORKS becomes available. And like a gift beneath the tree, everyone wonders what new improvements or new features they will get.
This year I’ve had the good fortune to get my hands on the pre-release of next year’s version of SOLIDWORKS. It has given me a chance to look at some of the features that will be offered—and select favorites.
I have more favorites than can fit in a single article, so this will be the first of a series in which I give new features a rating of 1 to 5 “Trains.”
Backward Compatibility
This one is very exciting: it is finally possible to save a SOLIDWORKS 2024 file as a 2022 or 2023 compatibility version – to some degree.
What does it do?
When saving the file, you now have the option to save it as a SOLIDWORKS 2022 or 2023 compatible file.
How to use it?
After saving your file as a 2024 version, you can use File > Save As.
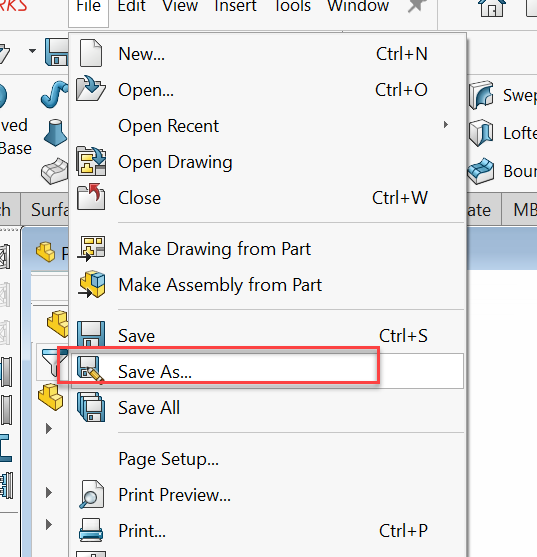
With the Save As window open, you can select if you want to save it as a 2022 or 2023 SOLIDWORKS file.
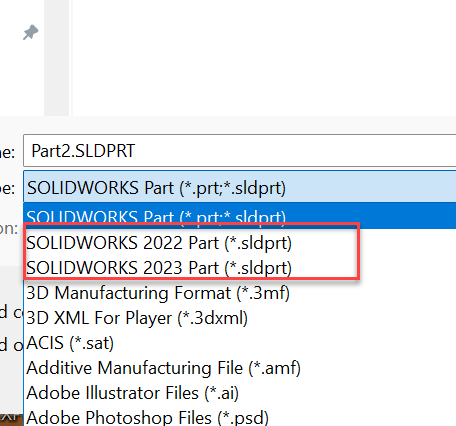
Once saved, you can open the file in that particular version.
However, if you are using one of the new features of SOLIDWORKS 2024, a popup screen will warn you that you cannot save your file before you remove that particular feature.
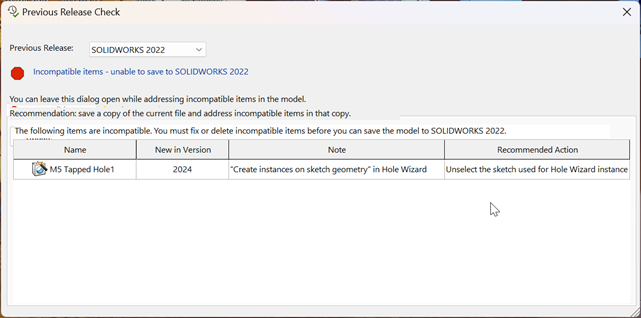
Once the feature is deleted, you will be able to save your file.
Note that you need to be on subscription in order to use this feature.
Do we need it?
All users have been waiting a long time for this and I really like what they have done with the option.
It makes sense, in my book, that it is not possible to save 2024 features in an older version. However, I am missing two things:
- An option to delete the features that will not let you save to a previous version from within the Save dialog box itself. That would make the process a lot easier.
- I can imagine that a lot of people will be using this, which means that it would be great if there was the option to set up a shortcut for saving in either 2022 or 2023 compatibility mode.
This is why I am giving the “Backward Compatibility” feature 4 Trains.

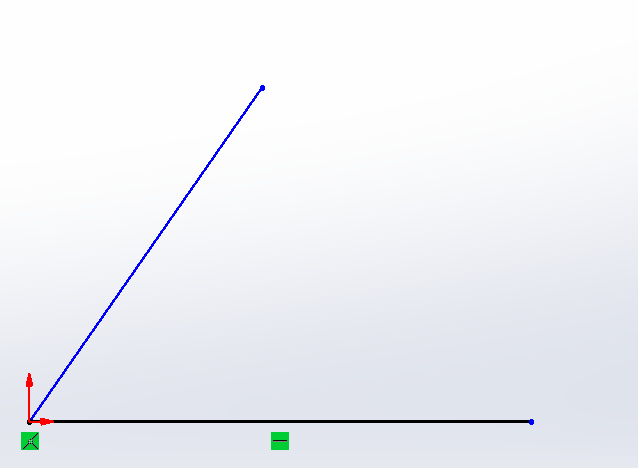
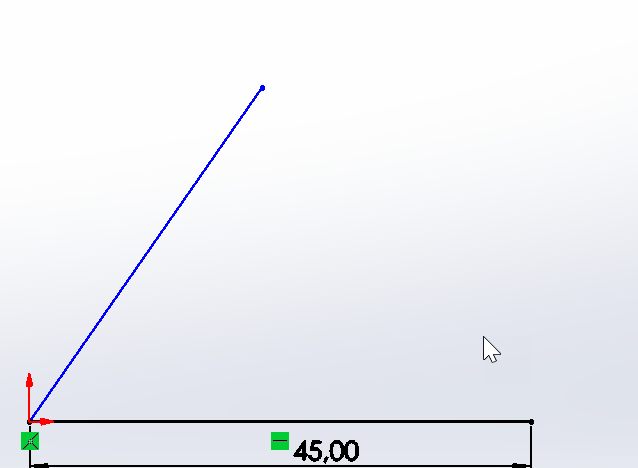
Sketch Dimension Preview
You now have the option to preview a sketch dimension before you create it.
What does it do?
Selecting a sketch entry now gives you a preview of the dimension, and clicking on it will give you a preview of the dimension.
How to use it?
After creating a sketch, click on one of the sketch entries and you will get a preview of the dimension.
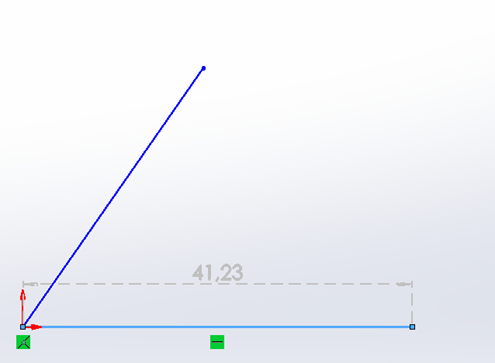
Clicking on the dimension changes your tool to the dimension tool, and you can change the dimension you want.
Once this is done, you can either create a new dimension or press escape to exit the dimension tool.
By holding down CTRL and selecting two lines, you can get a preview of the angle between the two lines. And as before, you can change the dimension as you see fit.
Do we need it?
I really like this new way of dimensioning as it feels more organic and can really help you speed the up your sketch creation.
It gets 5 out of 5 Trains from me.

Within the models and features, there are two things that I want to emphasize on:
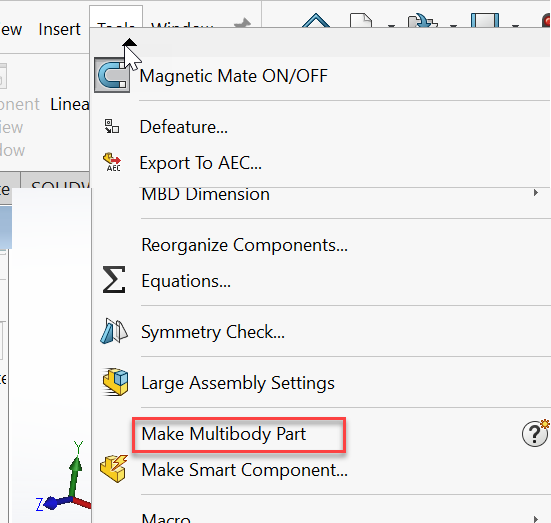
Convert Assembly to Multibody Part
At a first glance, this seems like “save assembly as part” in another wrapping, but it is quite the upgrade.
What does it do?
In SOLIDWORKS 2024, it is possible to create a multibody part from an assembly much like you would make a stock part.
How to use it
With the assembly open, go to tools and press “Make Multibody Part.”
This opens a new menu which gives you the option to decide what configuration you want to export to the new file, including covert surface bodies, axes, planes, coordinate systems and material. Solid bodies are always transferred.
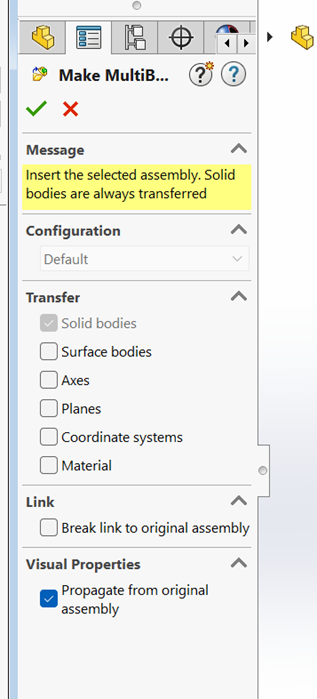
You also get the option to break the link to the original file, as well as keep the visual properties from the original file.
Press OK and the file is created.
If you have selected to keep the link to the original file, the file will update if you add components to the assembly.
With previous versions, it was possible to save your assembly as a multibody part file. However, this part had no link to the original file and any updates were lost, and you had to create a new file. With this feature, it is possible to always have the latest file of the assembly on a part.
Do we need it?
I really like the possibilities with this new feature. By suppressing components in a configuration, you can easily decide what you want included in the exported part. This is also one of those things we did not know that we needed, but which has been provided.
Once again 5 out of 5 trains from me.

Hide and Show
If you select multiple instances, i.e. sketches, bodies or planes with different visibility, in SOLIDWORKS 2024 you will get an option to either hide all or show all.
What does it do?
In previous versions, when you selected instances where some are hidden and some are visible, your option was limited after selecting them.
In SOLIDWORKS 2024, you get the option to either hide them all or show them all.
How to use it?
Select either multiple bodies, sketches or planes by hold down CTRL while you select the different objects. Or select them by using the selection tool.
A selection menu will appear allowing you to hide all instances or show all instances.
Do we need it?
You can achieve the same effect with a right click after selecting the components, meaning that you save a mouse click. I was a bit skeptical at first, but after playing around with it, I can see its potential.
This is why I am giving this feature 4 Trains.

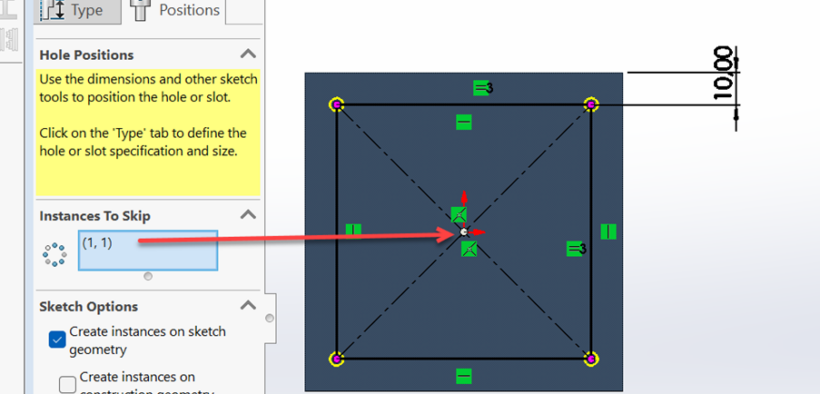
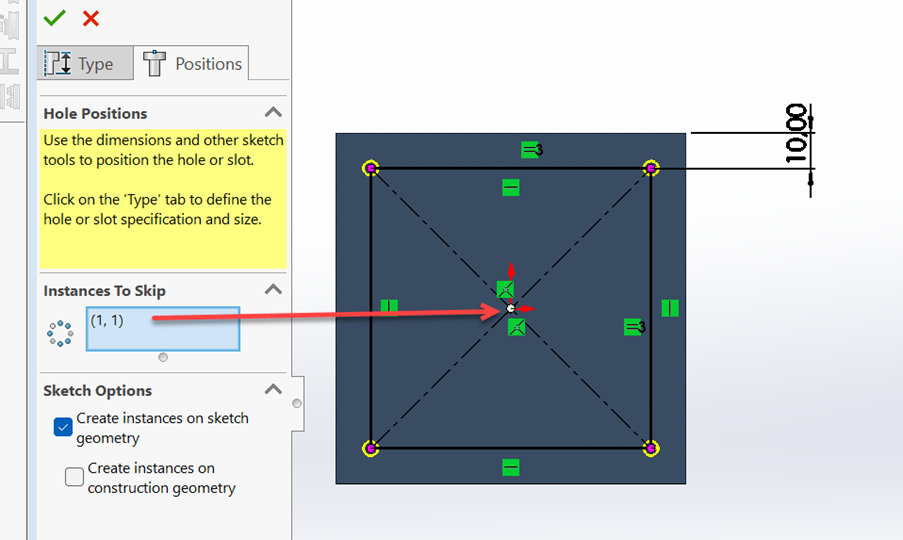
Use an Existing Sketch in Hole Wizard
This one is one that I remember missing, while working in my previous job.
What does it do?
In previous versions, you had to select the points individually if you wanted to use an existing sketch.

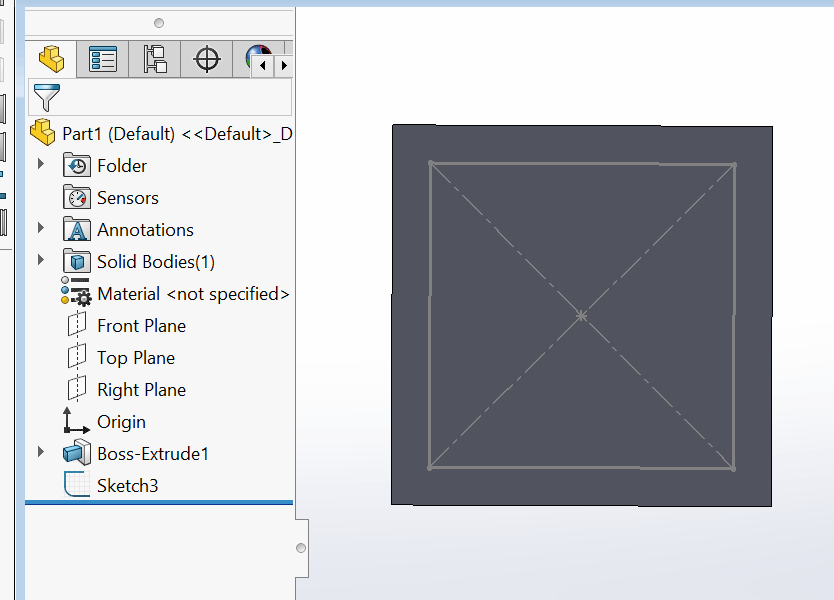
Now you can use an existing sketch as a hole location.
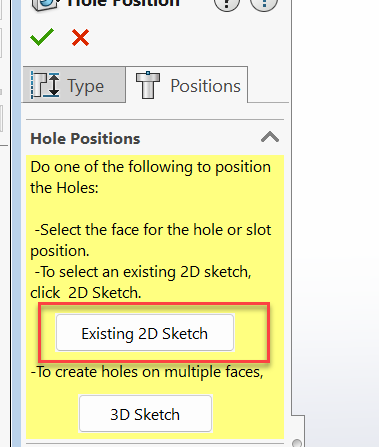
How to use it?
You can start by selecting the sketch and start the hole wizard and select the hole size.
Or you can select the hole wizard, select the sketch and when you need to place the holes, you select the sketch from the flyout tree.
For both cases, the location of the holes will be determined by the placement of the points. This means that if you have a rectangle, the holes will be placed in the corners.
You can plan your hole location using different sketches, and if you add a hole in the sketch, a hole will be added to the model.
The sketch menu will also give you the option to skip instances of points in the sketch.
Do we need it?
This addition can be a real time saver, as well as a great way to edit your Hole Wizard locations.
I am feeling generous and will give this 5 out of 5 Trains.

That’s all for now, but stay tuned for the next article in the series.